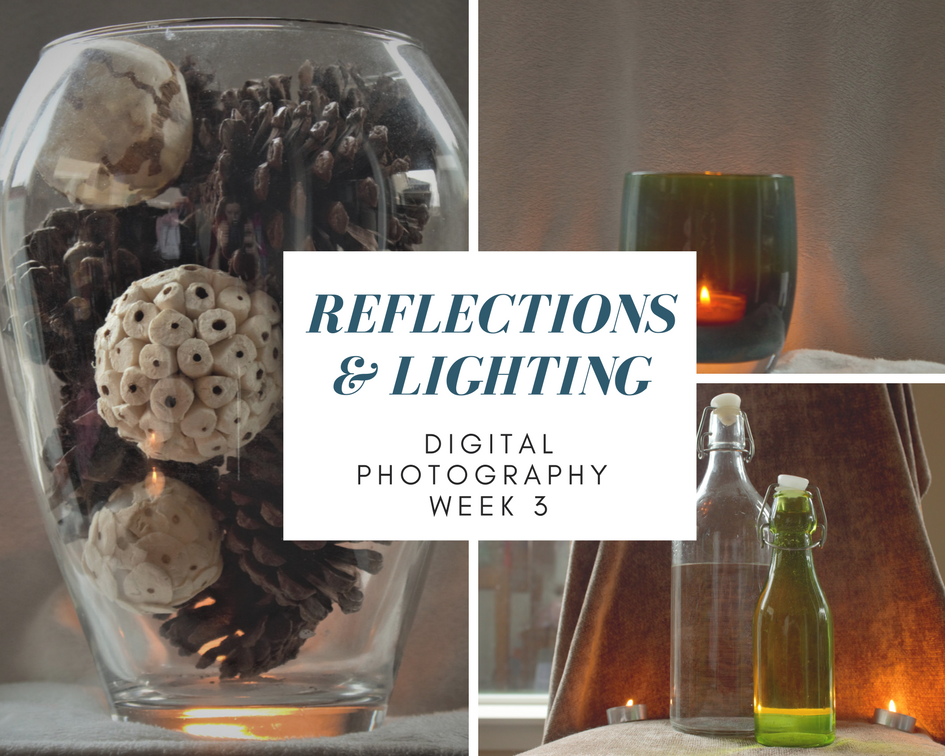
Digital Photography – Still Life Reflections
I really wanted to love doing nature photography. I enjoy looking at nature pictures and often think I wish I could take photos like that. I haven’t been at it very long, but at this point, I’m not even sure I can say I like it.
However, after my brief attempt last week at still life photography I am hooked. Yes, I certainly ran into some issues, and this is definitely not one of those things that I just get, but I really enjoy it. I couldn’t wait to spend some time this week working on different lighting. I figure once I get a handle on the lighting, I can move on to more complicated compositions.
I think this is also a chance for me to get more comfortable with the camera in a controlled environment. Outside the weather changes and the people, animals and things keep moving. All of that means adjustments to the settings on the camera, which I’m not able to do very well on the fly. This is probably the real reason I don’t enjoy nature photos right now.
With indoor still life, I am in control of the lighting and nothing moves unless I move it. It is a something I can do while the kids are napping and distractions are limited. A much better learning environment for me.
TODAY’S TOOLS
- Tripod – to keep my camera steady
- Dining table chair – to set my items on
- Verilux HappyLight 6000 – a very bright light
- 2 Scarves – to filter the light
- 3 tealights
- 2 blankets – for my backdrops. A baby blanket with a white back and a neutral throw
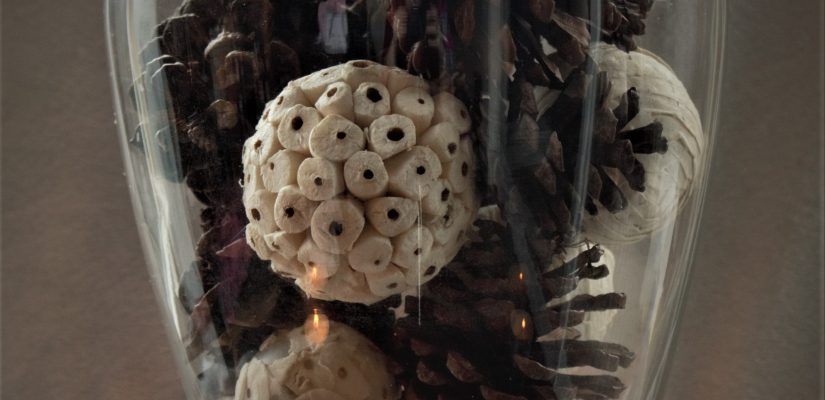
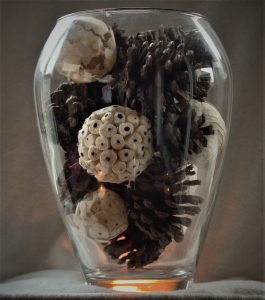
A FILLED VASE
Again, I wanted to work with simple subjects so that I could just focus on the lighting. I started with a vase that I currently have filled with pinecones and decorative balls. I’ve been working in our dining room which has 3 walls of windows so the natural light in there is great. The day was overcast but there was still enough light to not need a flash.
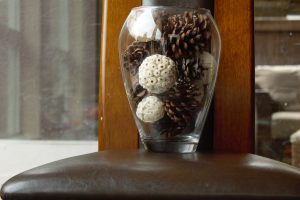
While all the windows are great for natural light, I quickly learned they can cause problems when photographing glass or any object with a reflective surface. I moved the chair I was using as a backdrop so that the back faced the window with the most incoming light. I then adjusted where my camera and tripod were set up in order to find an angle with the least amount of reflection. This was more successful, but I still got a reflection of me in the glass. I’m sure there are ways to deal with this, but I’m not there yet.
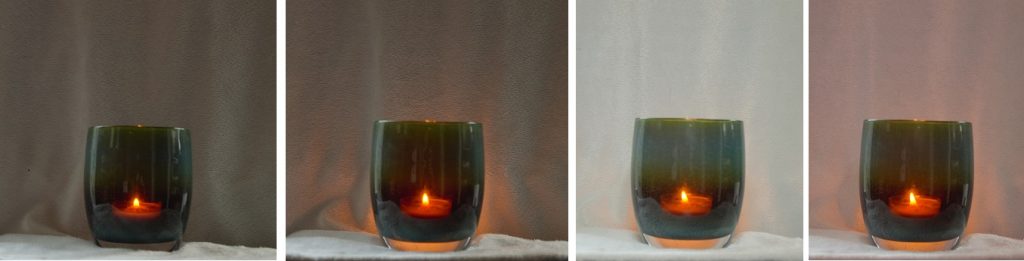
A DARK GLASS VOTIVE
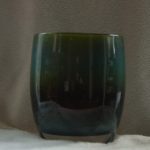 I decided to move on to a different object. Next on my list was a pretty, multi-hued votive. After taking a base shot, I lit the tea candle inside. I was surprised how the dark colors of the votive become almost transparent. Wanting a bit more glow, I lit another tea light behind the votive. Next, I turned on my HappyLight (not a lot of sun in Northwest winters), which made things a bit too bright. Then I placed a mauve scarf over the light to see if that would have any effect. See the results below.
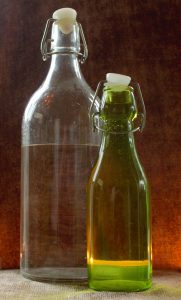
GLASS WATER BOTTLES
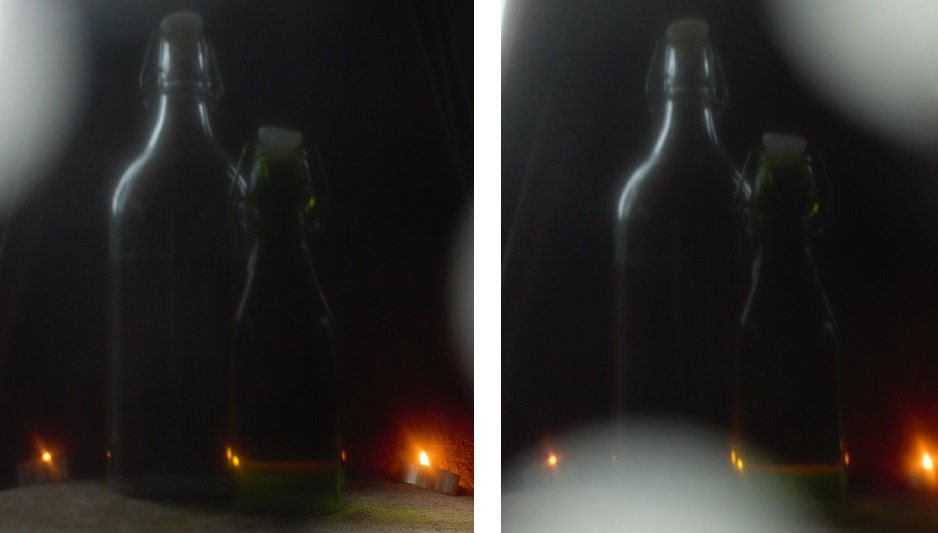
Unsure of what to do next, I moved on to the final objects I selected for the day’s tests. Two glass bottles that I partially, and fully, filled with water. I partially chose these two so I could do some practice shots for an upcoming hobby. I again went with a base shot, candlelight, the Happylight, and then scarves.
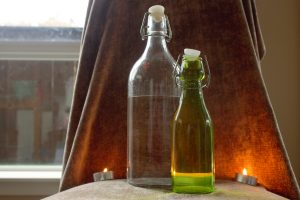
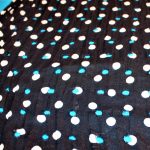
This time I tried something different with one of the scarves. Rather than hold it over the light source, I held it over the camera lens. It is a thin black scarf with white polka dots and circle cutouts. I really had no idea what the effect would be, and I was pleasantly surprised. I really liked the way the cut-out put one spot I focus while everything else was in shadow or hidden by a bright blur spot. This is definitely something I’ll play with more in future shoots.
TAKE-A-WAYS
- Out of the different lighting techniques I’ve tried I really like using candlelight. I like the way it can add warmth and focused glow spots.
- Try a variety of lights and filters. I really thought the mauve scarf would add more of a pink effect than it did. On the other hand, I really wasn’t sure if covering the lens with the polka dot scarf was going to do anything other than give me a black picture, and I ended up really liking the result.
- Reflective objects are tricky and I think my choices this week may still be a bit beyond what I should be working with.
- Never underestimate the power of a little photo editing. Since I am trying to learn how to take good pictures, I am trying to limit how much I use the photo editing tools. However, I have learned that even some minor tweaks to coloring or clarity can make a huge difference.