Giving New Life to Broken Crayons
The next few weeks are going to go a bit off track from my usual plan of trying a hobby for at least a few weeks. Christmas is coming and trying to be budget conscious and thoughtful, I plan on making some of the gifts. These gifts could easily become hobbies, but for the sake of time, I will just be doing some short-term sampling of them.
This weeks project is shaped crayons.
A couple of people on my list have multiple younger children so rather than doing individual gifts, I am planning to put together little art/activity baskets for them. While I was looking for ideas of what to put in them, I ran across some tutorials for turning broken crayon pieces into shaped crayons. I’ve got a 2 and 4-year-old so I have plenty of broken crayons on hand to work with.
The tutorials seemed easy enough; put the broken crayons in a silicone candy mold and either bake or microwave them. It looked like the hardest part was going to be picking out a silicone mold; since I didn’t have one.
Choosing a mold
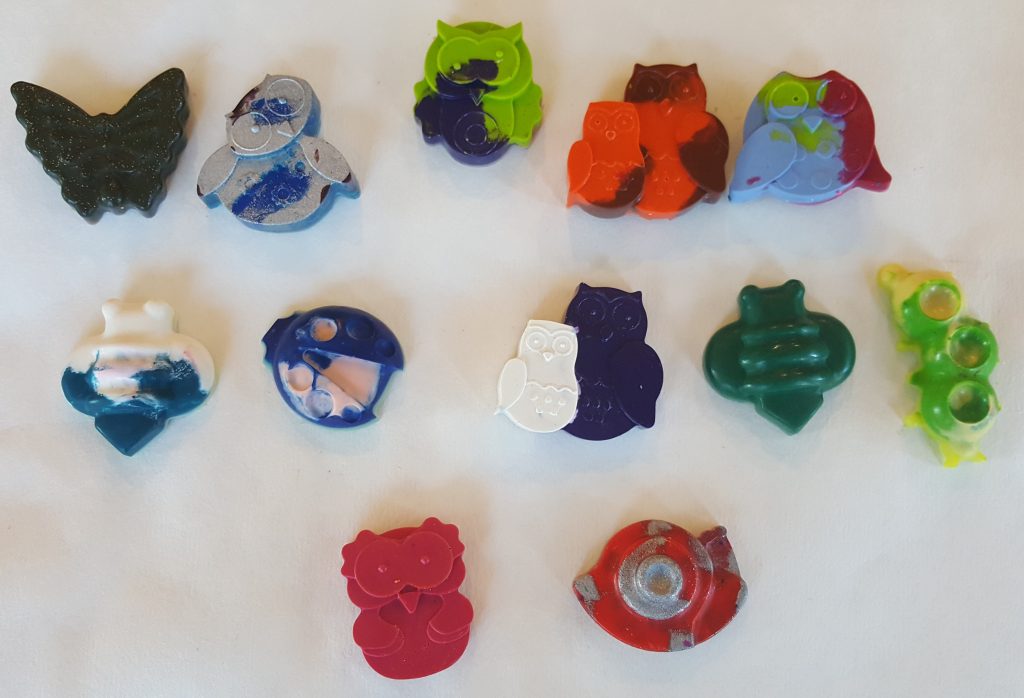
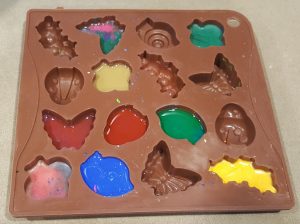
I went online to check Michael’s and Amazon. There are a lot of options out there: Lego bricks and characters, animals, flowers, gummy bears, holiday shapes, something for just about everyone. I thought long and hard about the lego pieces and some really cute sea animals, but ultimately I chose a 2-pack with owls and insects. My daughter really likes birds and butterflies, and the little peanut is the main user of the crayons in my house, so this was the winner.
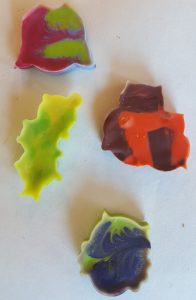
If I were to do this again, I would possibly rethink the insects. Too many little cutouts or intricate edges can make cleanly removing the finished crayons difficult. I have yet to make a caterpillar without a missing leg or antennae.
Preparing the Crayons
It turned out that picking out the mold was the second hardest part. The hardest part for me ended up being taking the paper off of the crayons. In order to make sure I had enough for both gift baskets and my munchkins, I ended up picking up a box of crayons from the dollar store so there was a lot of paper to remove.
After I had tediously peeled the paper off of a few crayons, I saw on one site that they were able to use a knife and do a neat slice down the length of the crayon and have the paper slip right off. My knife skills are rather lacking, I have the scars to prove it, and while I have yet to complete this technique with a single slice, it is a lot easier than the peeling.
Next came the fun part of breaking the crayons. When I first started I used a knife (yeah, I like to live dangerously) so that I could cut them all the same size. While it worked, it felt like it was taking too long.
I switched to breaking them with my hands, which was not only faster, but there is something oddly therapeutic about snapping crayons into pieces. Perhaps it was just my rebellious side coming out since as kids we are always told not to break our crayons. To my surprise, I was even able to keep the pieces about the same size. Success all around.
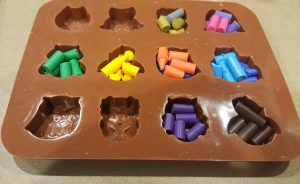
Filling the Molds
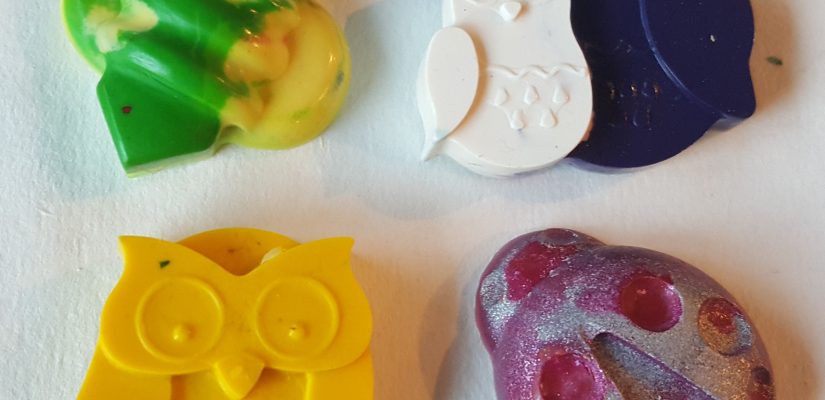
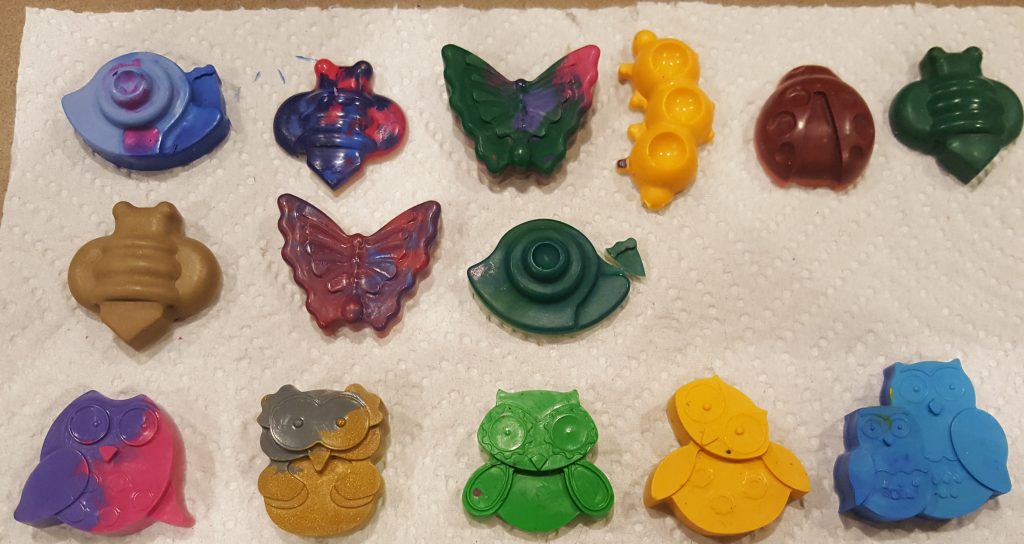
Now is the opportunity to get a little creative. Sure you could use one color per mold, but where is the fun in that? Put two or more colors into a mold to create really fun crayons. When the pieces melt, the colors will run together creating some interesting designs. Plus if you are working with previously broken crayons you may not have enough of a single color to fill the mold.
I wasn’t, and still am not, sure just how full the molds need to be. I just kind of guessed and because of this, I have crayons of varying thickness. Even the thinner ones came out thick enough to color with so I think there’s some wiggle room on this part.
The Melting
Everywhere I read it said 2-3 minutes on high in the microwave or 10-12 minutes in the oven at 250 degrees Fahrenheit. I never came even close to those times; all of my melts took a lot more time. My last batch took me 6 minutes in the microwave and the one that I did try in the oven was closer to 20 minutes.
If you use the microwave method I suggest letting them sit for a few minutes in the microwave before moving them. Not only are the silicone molds hot, but the wax sloshes pretty easily when you are trying to move it.
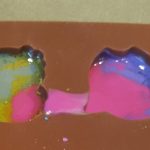
An odd thing I found was that some colors seem to melt slower than the rest. It seemed that in every batch there was at least 1 to 2 colors that would take an extra minute of cook time to melt. I always just let it go for the extra time, but a word of caution with this. The longer they cook the more the colors run together (if you are doing mixed colors) and I noticed the backs (air exposed side) seemed to be a bit paler than the fronts.
When you think you’ve waited long enough, wait at least another hour.
The Waiting
Once the crayons have melted you need to wait for them to solidify again. When you think you’ve waited long enough, wait at least another hour. You may even want to put them in the freezer just to make sure. I made the mistake with my first batch of trying to take them out too early and broke one. I left them on the counter for an additional hour and had much better luck with the rest of them. I would say at least three hours at room temperature. I don’t have room in my freezer right now so I didn’t try that method.
Shaped Crayons Items Needed
Silicone candy mold
crayons
microwave or oven
The Process
- Remove the paper from the crayons
- Break the crayons into pieces that will fit into the molds. (Try to keep the pieces similar in size so they melt more evenly.)
- Microwave for 2 minutes. Check, then microwave in 30-60 second increments as needed.
- Place the mold on a cookie sheet and bake at 250 F for 10 minutes. Check and continue baking until all pieces are melted.
- Allow pieces to cool at room temperature for at least 3 hours.
All said and done I really enjoyed making these. Not as much as my kids have enjoyed playing them, but it was still enjoyable. They have yet to use them as color crayons but rather as characters in the games they play. Because of this, I found out that if they break you can just put the pieces back into the mold and remelt them.
Umm- you are a genius!!
It’s amazing the ideas you can find when you spend too much time on Pinterest.