Cherry Blossoms in Watercolor
For my second attempt with watercolors, I decided on a cherry blossom branch. Not sure why, but I really wanted to paint some cherry blossoms. Perhaps because it is the middle of winter and I am yearning for a pop of color to brighten up the drab gray that has been our weather of late. I really don’t mind winter, and ours has been fairly mild, wet for sure, but mild. But the grey skies of the Northwest are starting to wear on me and I am ready for some color.
Pre Painting Prep
This time I did start by watching some videos. I did a search for “how to paint watercolor cherry blossoms,” but this did not stop results for other painting mediums showing up. While there are a number of videos out there, they are definitely not created equal. Some very clearly explain what they are doing, what tools they are using, etc. While others have no words and are shown at a sped-up pace; not really good for a beginner.
After watching numerous videos I decided to hope I’d absorbed enough and attempt one on my own. Probably not the best idea, but I couldn’t find a tutorial I liked that painted the image I wanted.
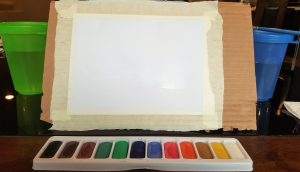
This time around I taped my paper to a piece of cardboard because I wanted to attempt a technique where the paint flows down the paper and I would need to prop the paper up for that part. However, I started with the paper flat on the table so that my flowers didn’t run.
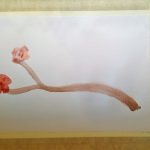
Not wanting the background to interfere with the main image (like it did with my snowman), I decided to paint the branch and blossoms first. Last night I had pulled up a few images that I liked and planned to use those as a model. Unfortunately, those images were on my Kindle upstairs and leaving the room would have disrupted the calm. 2-year-old Peanut was joyfully painting a purple mustache on Cinderella in her watercolor paint book and 4-year-old Bug was happily melting more broken crayons in the microwave. I really saw no other option but to wing it.
Branching Out
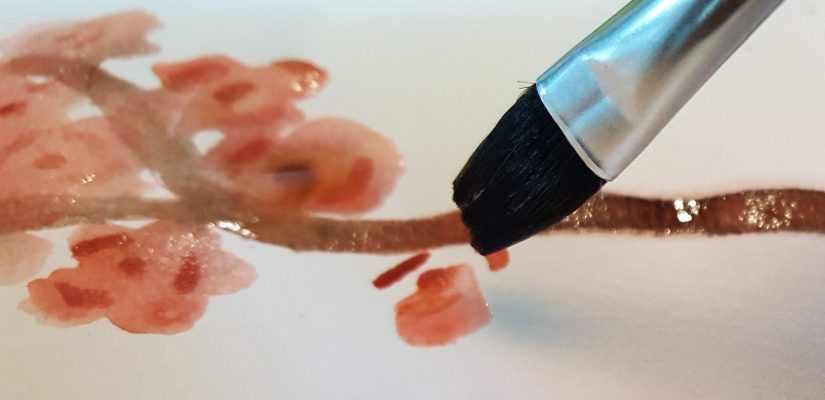
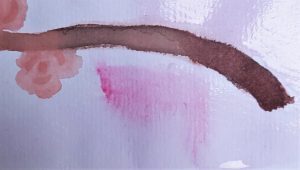
 The branch was a couple of swipes of brown, which I then added some red too, and later came back and added some black as well, just because I wanted it a bit darker.
Blossoming
Every video I watched had a different way of painting the cherry blossoms. The one that most appealed to me for the simple look I was going for, was a two-step process. First, you put a dot of red for the center of the flower and then a couple of curved swipes around the dot. For that part, I used my rounded, finer tip brush.
For the second step, you get a wider brush wet and swipe out from the center in a petal shape. As you swipe the wet brush through the red it spreads into a much softer color. You could do this with pink as well if you wanted even softer looking petals, but I liked the pinkish-red hue.

There is definitely a bit of timing to this. I found that if I painted the flowers too close together without allowing any dry time, they sort of ran together. Depending on the look you are after this could be a good thing. If you want them to stand more on their own, I’d space out the ones you work on and then come back and fill in any that might overlap. As long as you aren’t soaking the page they dry pretty quickly, so by the time you have done one or two others you should be able to go back.
Happy Accidents
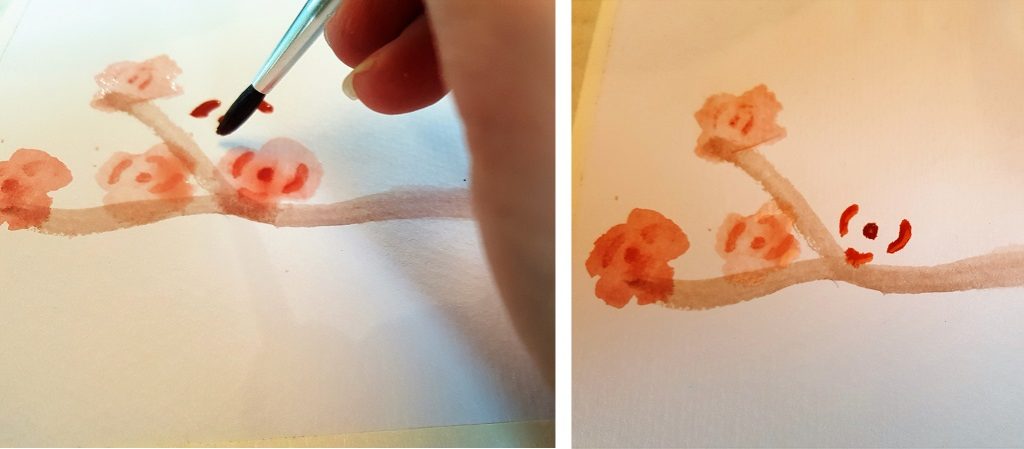
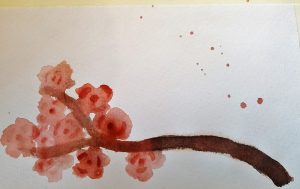 So, while I was painting the flowers I didn’t notice that I had splattered a bit of the red across part of the page. I thought about extending the branch to that area and turning them into more flowers. Then I decided I kind of liked the random dots and considered adding some more. I then vetoed that idea because art created by accident is very difficult to reproduce. In the end, I left them as is.
Behind it All
After letting the paint sit and dry for a bit I propped it up and started on the background. To do this I wet the area above the branch a decent amount and then using the wider brush and pink paint, I lightly drug it along the top of the painting. When you do this, the paint runs down the paper in a random pattern. I actually picked up the cardboard and tilted it a bit while it was running trying to control the direction it flowed.
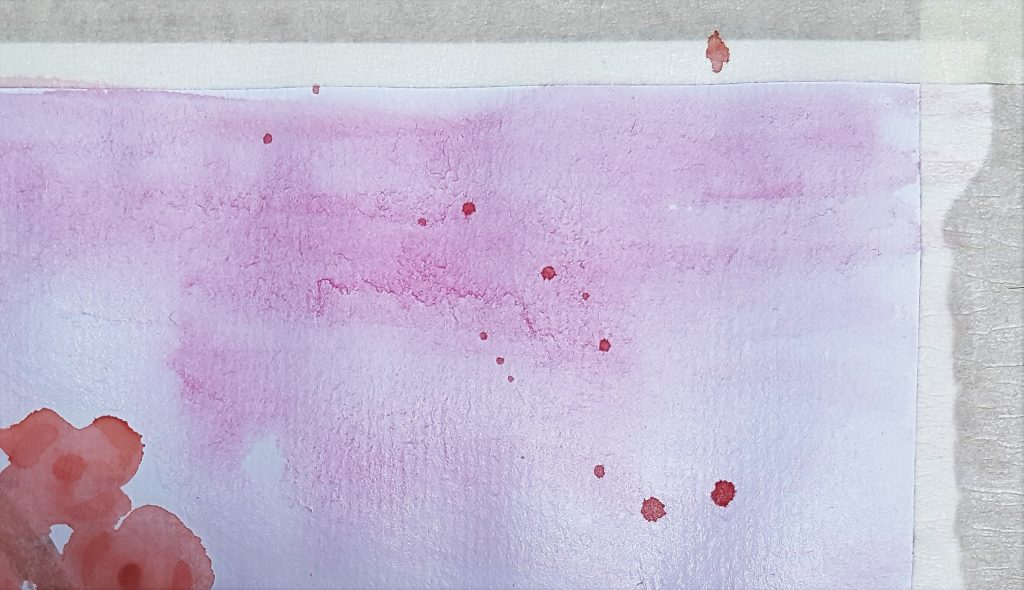
Once it had finished, I rinsed off the wide brush and slowly swept it back and forth across the paper to spread out the pink and give a slight pink tint to the entire background. I then repeated the process with the area under the branch, but I used a bit less paint, so it wouldn’t be as dark as the top of the page.
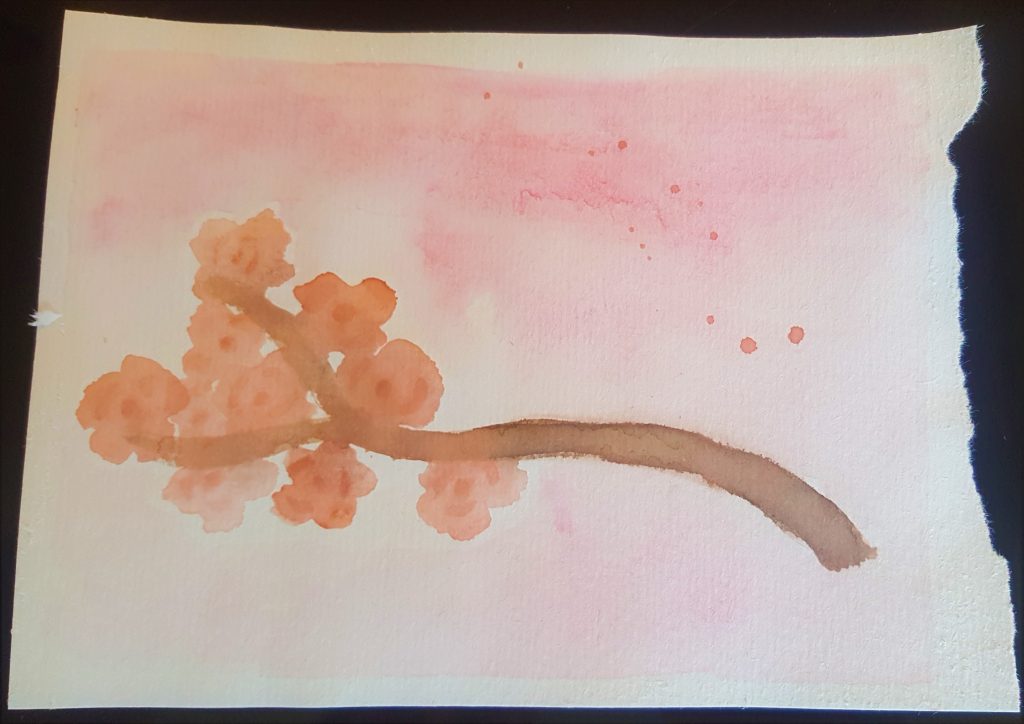
It’s not what I had originally envisioned, but I think it is a good practice round. I think next time I will actually sketch the outline of the branch, add more flowers, and if I’m feeling really brave, attempt the kanji for cherry blossom.